
Eligibility File
The Eligibility File feature allows you to limit scheduling access to only those participants included in an imported People file. When combined with Employee ID Login, participants will use their Employee ID to access the scheduler.
This is commonly used for:
-
Employee benefits enrollment
-
Open enrollment appointments
-
HR meetings
-
Wellness screenings
-
Staff training
-
Employee evaluations
-
Internal scheduling events
Step 1: Enable Employee ID Login
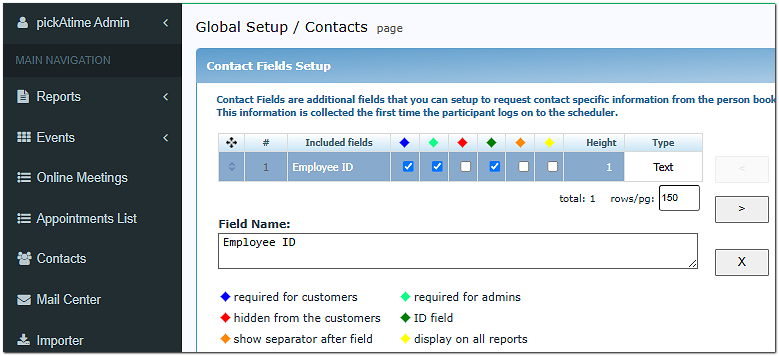
- Go to Global Setup/Contacts/ContactFieldSetup
- Create and add a field called Employee ID - or whichever unique field name you choose
- Click the green diamond to make an ID Field
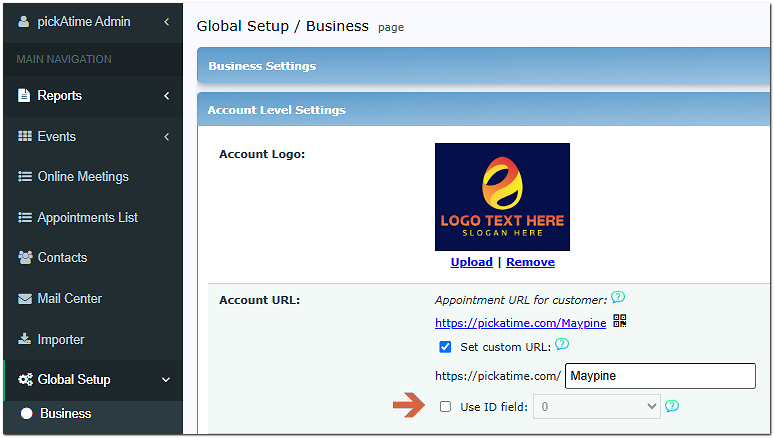
- Go to Global Setup/Business/Account Level Settings/AccountURL
- Set the participant login method to Use ID Field.
- And then in the drop-down, select your newly created ID Field
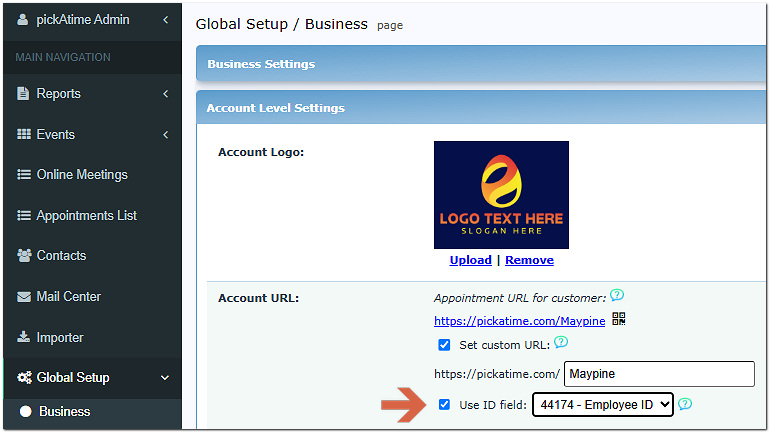
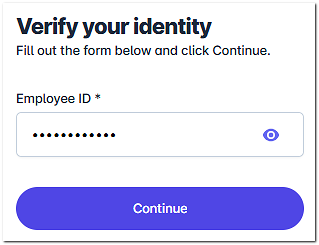
When this option is in use, participants will have to enter a unique ID (for example, an employee ID) after they enter their password or use Google to log in.
Step 2: Prepare Your People File
Create a spreadsheet containing one row for each eligible participant.
Required Columns
- ID - A unique identifier for each contact. Each ID must be unique across all imported contacts (Students, Teachers, Parents, People). - This is your Employee ID.
- First - The first name of the person.
- Last - The last name of the person.
- Email - A valid email address for the contact. Only one email address per row is allowed.
Format Requirements
- The file must be a tab-delimited text file (*.txt or *.tsv).
- Each row must represent one person.
- Field names (column headers) must exactly match the required field names (case-sensitive).
- Avoid using formulas, merged cells, or formatting.
Sample Table
| Employee ID | First | Last | |
|---|---|---|---|
| 00123 | Alice | Martin | amartin@example.com |
| 00456 | John | Stevens | jstevens@example.org |
| 00789 | Rosa | Delgado | rdelgado@example.net |
Additional fields such as department or location may also be included if desired.
Important: Each Employee ID must be unique. Duplicate Employee IDs may prevent participants from logging in correctly.
Step 3: Import the People File
- Go to the Importer Page.
-
Choose People Import.
-
Browse to and select your People file.
- Click Import.
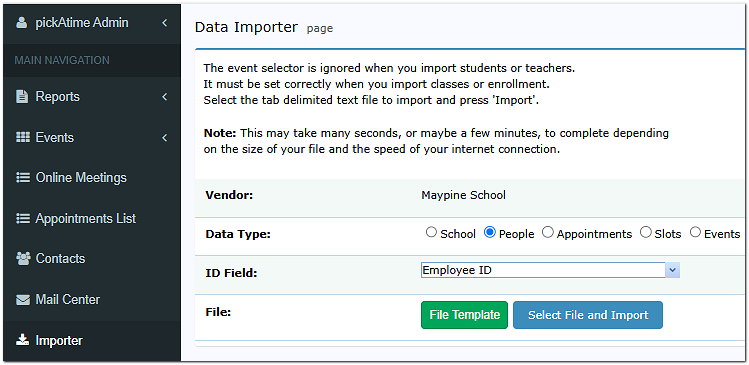
pickAtime will create a participant record for each person in the file.
Step 4: Verify the Import
After the import is complete:
-
Open the Contacts or People list (depending on your event configuration).
-
Confirm that:
-
All participants were imported.
-
Employee IDs appear correctly.
-
Names are spelled correctly.
-
No duplicate records exist.
-
Step 5: Test the Login
Before making the scheduler available:
-
Open the Online Scheduler.
-
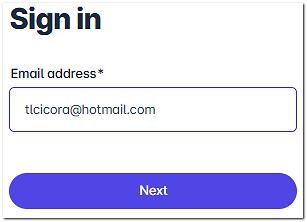
Enter the email and password for one of your imported participants.
-
Enter the Employee ID.
-
Verify that the participant can successfully access the scheduler.
Managing Eligibility
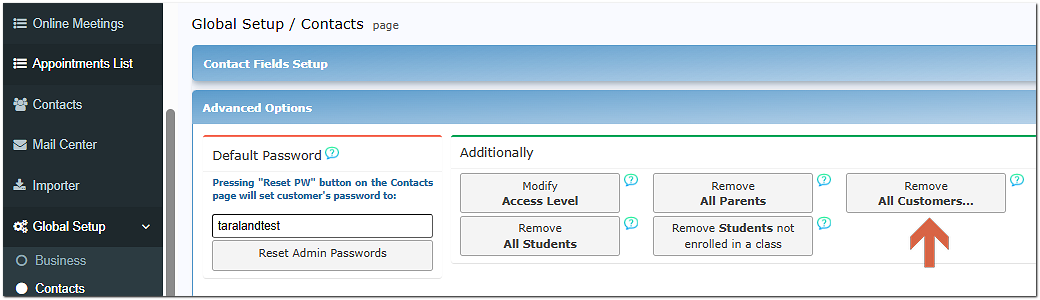
The imported People file acts as your eligibility list. However, anyone who is already on your account will still have access without needing their Employee ID. If this is not acceptable, then go to Global Setup/Contacts/Advanced Options/ Remove all Customers to remove all contacts before doing your import.
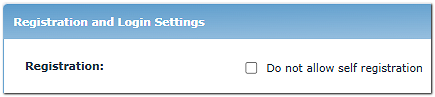
To keep your contacts from attempting to create new accounts, go to Registration and Login Settings (Located in Global Setup/Business/Registration and Login Settings) and select Registration.
Registration: Do not allow self-registration - Prevents new users from creating their own accounts. Access is available to customers who have been manually added or imported to the vendor account. Please note that this option is now automatically disabled when “Show the scheduler to users before they log in” is enabled.
Best Practices
-
Use Employee IDs that are already assigned by your organization.
-
Verify Employee IDs before importing.
-
Test with a few sample users before opening scheduling.
-
Keep your People file up to date as employees join or leave the organization.
-
Save a copy of your original spreadsheet for future updates.
Frequently Asked Questions
Can I import additional participant information?
Yes. You can include optional information such as email address, department, phone number, or location if those fields are supported by your event.
What happens if someone is not in the People file?
They will not be able to access the scheduler using Employee ID Login.
Can I update the eligibility list later?
Yes. You can import an updated People file at any time to add or update participant records.
Why isn't a participant able to log in?
Common causes include:
-
The Employee ID was entered incorrectly.
-
The participant was not included in the imported People file.
-
The Employee ID in the import file does not exactly match the ID being entered.
-
The People import did not complete successfully.