
Connecting payment with Stripe
To accept payments via Stripe in pickAtime, follow the steps below.
Note: You must have a Stripe Business account to proceed.
Instructions for Setting Up Stripe:
- Log in to Stripe using your Business account.
- In the top-right corner, click Switch live account (not Sandbox).
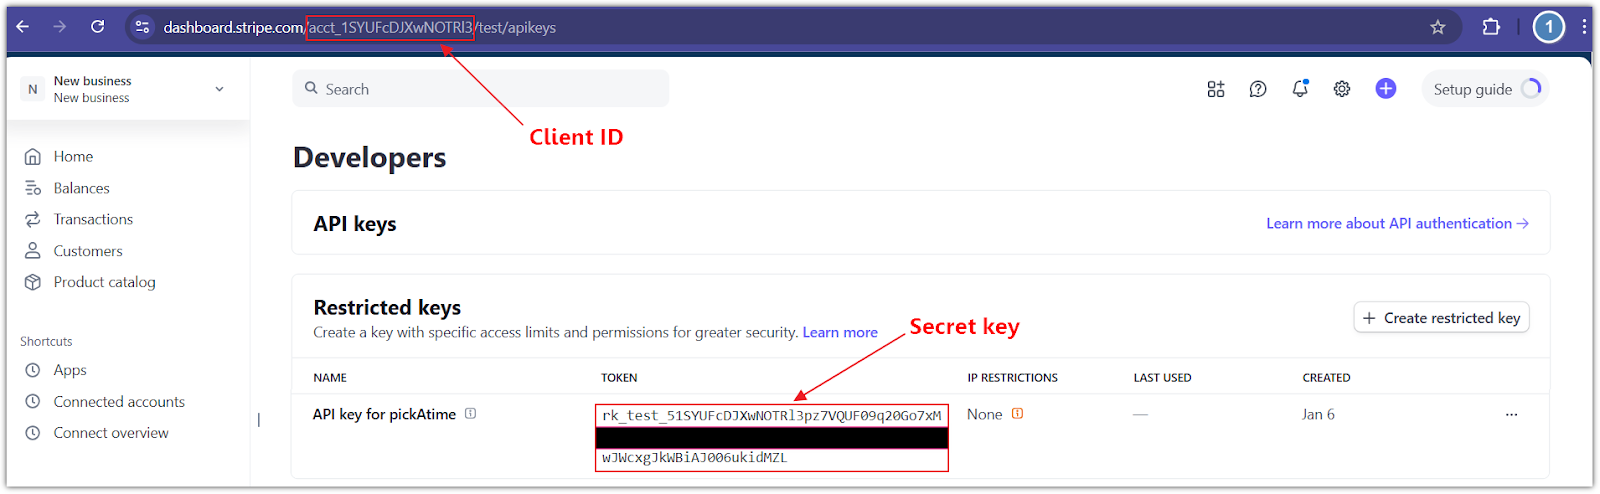
- In the bottom-left corner, click Developers > API keys.
- In the Restricted Keys section:
-
- Click the Create restricted key button.
- Select the Providing this key to another website option and click Continue.
- Enter the Name of the 3rd-party you're giving your API key to i.e., ‘pickAtime’.
- Provide a link to the 3rd party you're using: ‘https://pickatime.com/’.
- Leave the ‘Customize permissions for this key’ unchecked and click the Create restricted key button.
Configure pickAtime:
-
- In pickAtime, go to Admin UI / Settings / Credit Card Setup.
- From the drop-down menu, select Stripe.
- Paste the Client ID and Secret key into the corresponding fields.
- Click the "Check Credentials" button.
- If successful, your PayPal integration is now active.
You are now ready to begin accepting payments via Stripe through your pickAtime scheduling system.
You can accept payments for appointments at either the Event Level (for single bookings) or the Account Level (for multiple bookings via a Shopping Cart).