
Directions for Parents
Follow the link provided by your school to access the Scheduler.Scheduler, Once on the site,then follow the steps below:below.
1.Step 1: Sign In
- Enter
Email:Typeyour emailaddressand click Next. - Returning
Usersusers::If your email is recognized, enter your password. - New
Usersusers::If your emailis notisn't registered, follow the prompts to Sign Up.
2.Step 2: Select Teachers
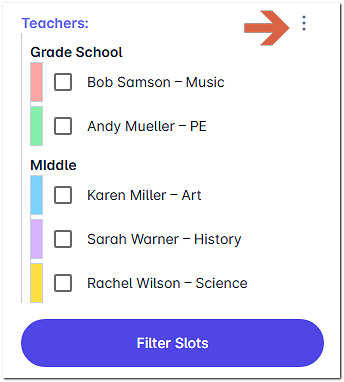
By default, all of your student's teachers will appear.
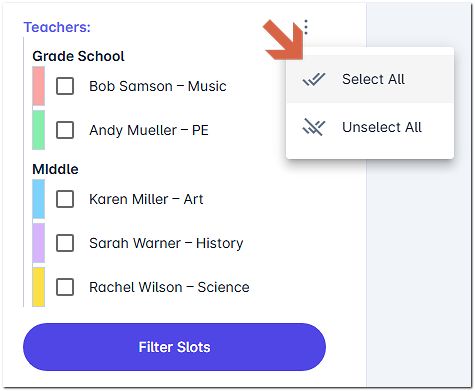
- To select a
teacherteacher::Check the box next to theirname.nameOr— or click the three dots (⋮) and choose Select All to selectthemeveryoneallatby clicking the three dots and then selecting the option 'Select All'.once. ToWhenproceedready::Click Filter Slotsonce you have finalized your list..
3.Step Booking3: Book Appointments
The scheduling grid displays available times as squares with a plus sign (+).
- Click
onyour preferredTimetimeSquare.square. - Enter
intheStudentstudent'sNamename or any otherprompts selected byinformation your school requires. - Click Create Appointment.
- A confirmation message will briefly appear at the top of the
screen to confirm your booking.screen. - Repeat
these stepsfor each teacheryouyou'dwishlike to visit.
Managing Your Schedule
View or Print Your Schedule
ToClick Printable Schedule in the left-hand sidebar to see your full itinerary, click the Printable Schedule on the left-hand sidebar.itinerary.
Changes & Cancellations
If you are usingOn a Computer (Desktop):computer:
Click My Appointments
onin the left-hand sidebar.Locate the appointment
youyou'dwishlike to change.Hover
your mouseover the appointment to revealtheDetails, Edit, and Canceloptions on the right.
If you are usingOn a Mobilemobile Phone:phone:
Important Notes:
Notes
If you haveFor questions orneedtechnical assistance, please call the school office.