Administrator Access
You can upgrade any existing contact to an administrative role or create a new administrator from scratch.{{@167}}
Assigning Access to an Existing Contact
Navigate to the Contacts tab.
Search for the contact by name and select them from the list.
Use the Admin Level dropdown menu to select the appropriate permission level.
Adding a New Administrator
Click the green Add button in the Contacts section.
Select Admin... from the options.
Fill in the required contact information.
Set the Admin Level using the dropdown menu.
Note: New administrators will be prompted to create their own password the first time they log in.
Administrative Permission Levels
Each level provides a different degree of control over the account:
Admin Level
Capabilities
Configuring Access Restrictions
For most roles, you must specify exactly which teachers or events the user is allowed to manage. All administrative levels include the ability to view reports.
Assigning Teacher (Resource) Access
For Appointment Viewers, Appointment Makers, and Resource Administrators, you must define their specific scope:
Go to the Vendor Access tab.
Use the Resource Access block to select the specific teachers or resources this contact can manage.
Assigning Event Access
For Event Administrators, you must specify which events they can oversee:
Go to the Vendor Access tab.
Use the Event Access block (located in the lower right-hand table) to grant access to the appropriate events.
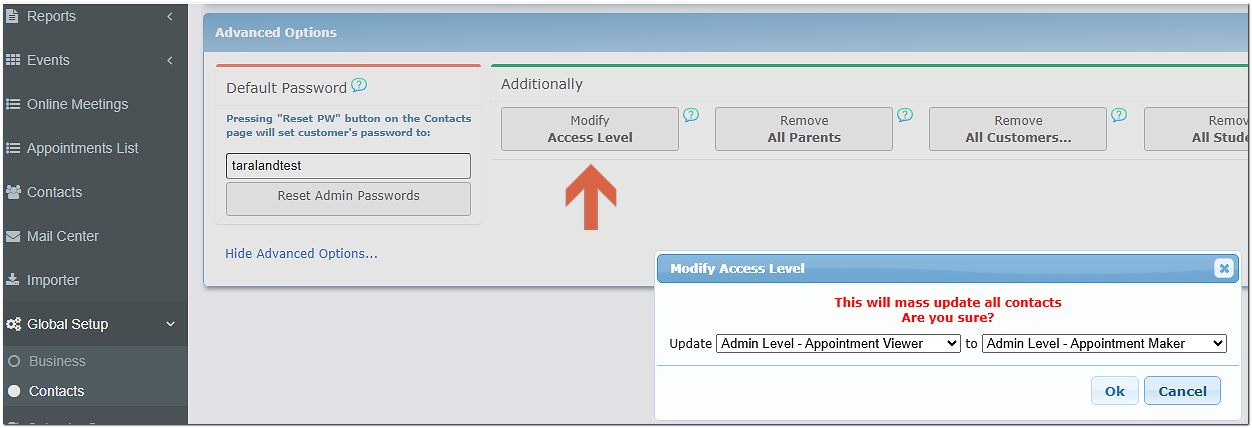
To update multiple Admins
To update groups of Admins to higher (or lower) levels, go to Global Setup/Contacts and under Advanced Options / Additionally select the Modify Admin Level button.