
Zoom Admin Managed App
PickAtime offers the option to use Zoom within events. There are two ways to use Zoom.
In the first option, the teacher would use their own account to create a single Zoom URL, which would be placed within the Room column in the Appointments Tab within Event Management.
The Zoom Integration
The second option is the integration with Zoom itself. With the Zoom integration, teachers can offer individual Zoom online meetings. The Zoom links are automatically generated for customers and parents. There is no additional charge from pickAtime for this integration.
Please note: When you activate the integration, it will not display the Zoom link information placed in the Virtual/Room column.
To use the Zoom Integration with pickAtime, you will use the Admin Managed application.
1. Go to pickatime.com and log in. Ensure that you have all of your teachers imported, and go to the Admin UI tool, Global Setup / Business page, Integration Options section
2. In the Zoom Integration section, click the Connect and Map Contacts button.

3. Permit the app (if you are not logged into Zoom, you may be asked to log in) for meetings (first icon listed).
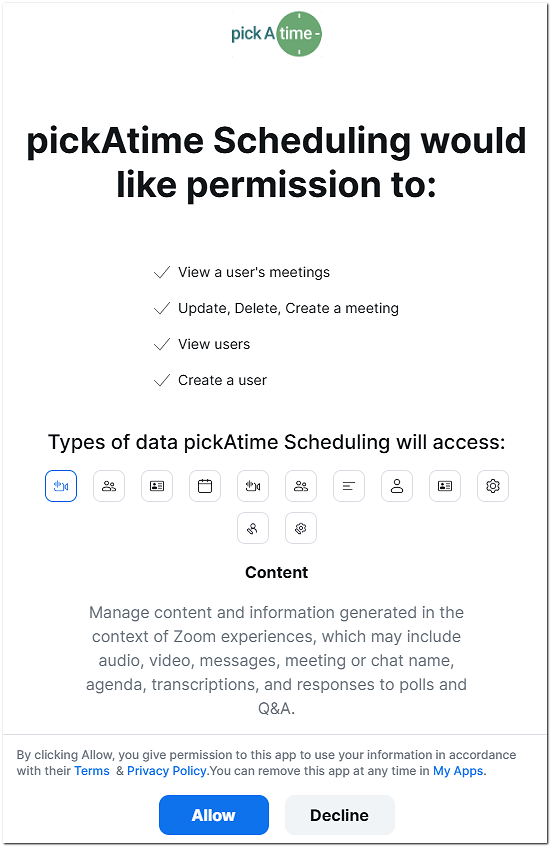
4. The app is now connected.

5. Once the mapping is complete, a pop-up dialog box will appear giving you the details.
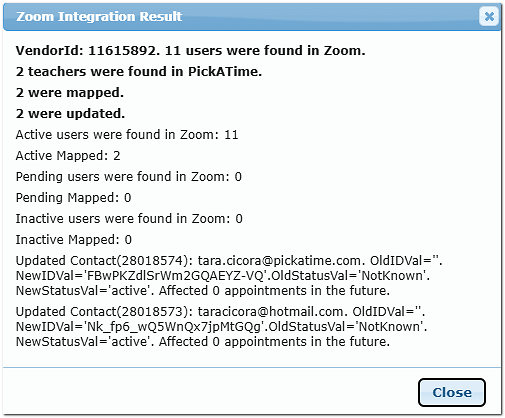
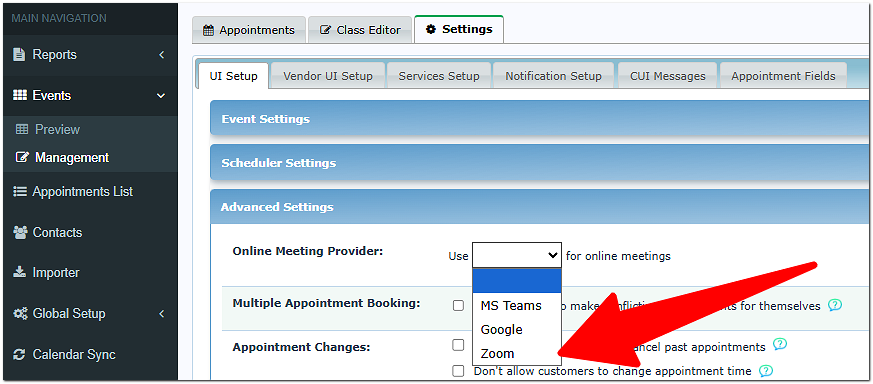
This will activate the integration on an account level. To activate the Zoom integration for an individual event, go to Events Management / Settings / UI Setup / Advanced Settings / Online Meeting Provider and then select Zoom.
Online Meetings Page Guide
This page helps Admins monitor the status of Zoom Meet link generation and teacher calendar syncs. This page will help you to ensure every virtual appointment is properly linked.
Sections on the Online Meeting Page
1. Online Meeting Sync
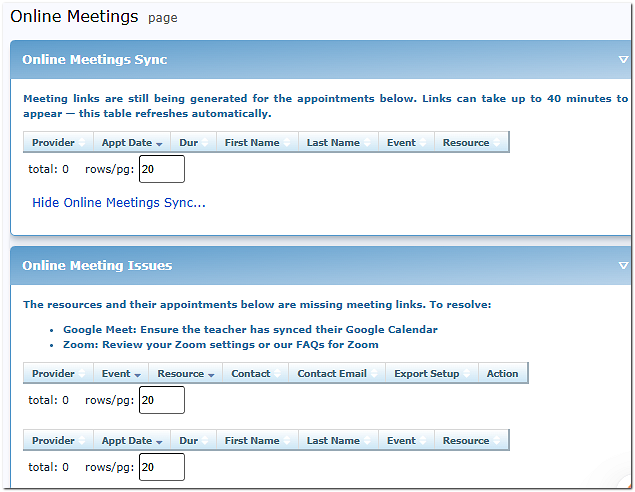
2. Online Meeting Issues
3. Calendar Link Setup Status
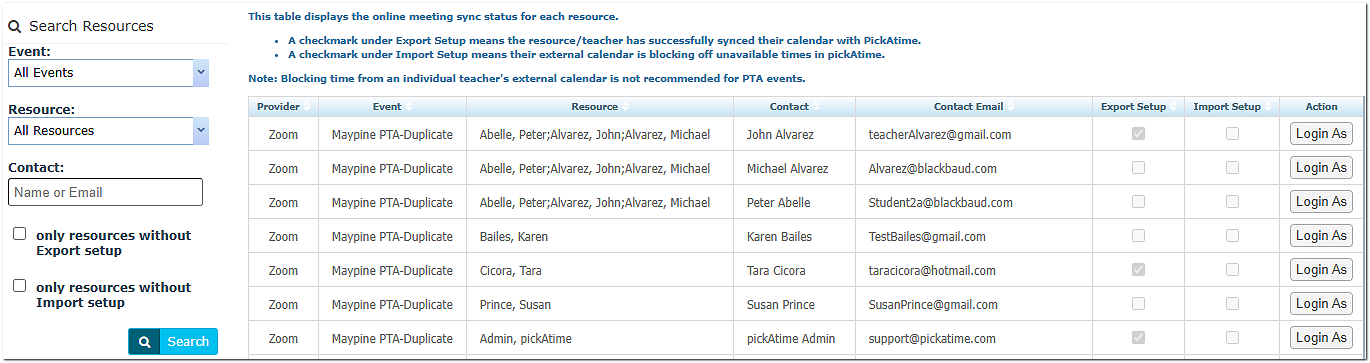
This section will show you if the teacher has synced their account or not and offers you the option to log in as the teacher directly from this page.
Export Setup
Import Setup
Important Admin Tips
Still No Link?
It might be due to:
Contact: support@pickatime.com
The Teacher Provides the Zoom link
To add a single URL for each teacher, do the following
1. In the Admin UI tool, open the event.
2. Go to the 'Settings\Vendor UI Setup' tab.
3. In the Slot generator, check the box for 'Show the "Appointment type".
4. On the 'Appointments' tab, create new time slots or update existing ones, setting the slot's appointment type to either 'virtual' or 'in-person or virtual'.
Once these steps are completed, you will see an additional 'Virtual Room' column to the right of the list of teachers, where you can add your Zoom links.
Room Macro
Please ensure that the room macro is added to the emails so that the participant can see the link.
To do this, go to Events Management / Settings / Notification Setup and review your Confirmation and Reminder emails. They should have the option to replace the Email Body with the Printable Schedule of Appointments checked. Within the Settings / CUI Messages / Printable Schedule section, you will see that the $Room macro is present.
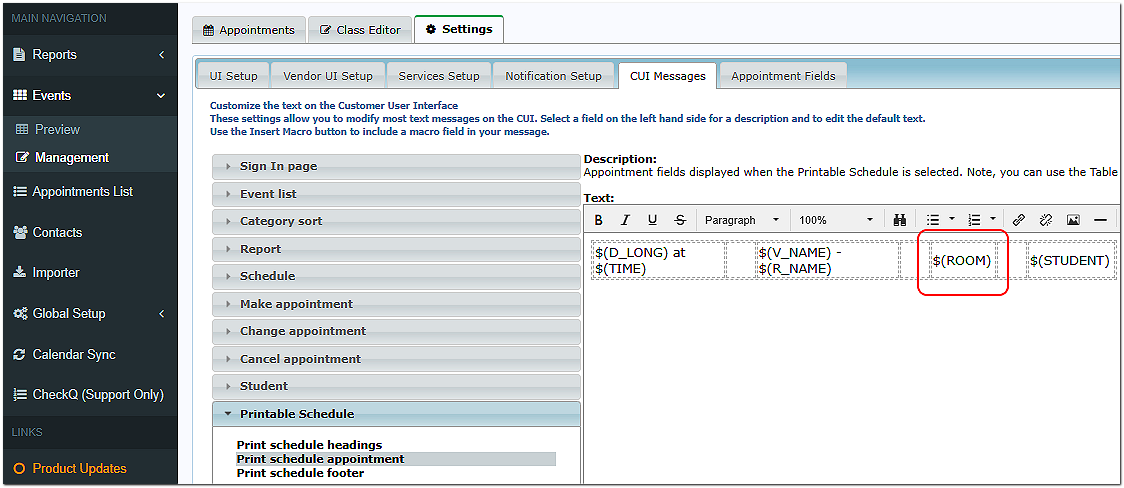
On the Printable Schedule, you will have the $(Room) macro - it is a universal macro that will use the value from the Room column or Virtual Room column based on the appointment type or from the integration itself. You do not need to make any changes to the Printable Schedule.