PickAtime Payment Options
- Payment Options
- Connecting payment with Authorize.net
- Connecting payment with PayPal
- Connecting payment with Stripe
Payment Options
PickAtime provides an integration with:


How to Set Up Payments in pickAtime
You can accept payments for appointments at either the Event Level (for single bookings) or the Account Level (for multiple bookings via a Shopping Cart).
Option 1: Event Level Setup
Best for: Simple bookings where customers pay for one appointment at a time.
- Open the Admin UI tool and select your specific event.
- Navigate to the Settings / Credit Card Setup tab.
- Choose your preferred CC Processor from the drop-down menu.
- Enter your credentials and configure the settings as prompted.
Option 2: Account Level Setup (Shopping Cart)
Best for: Allowing customers to book multiple appointments across different events and pay in a single transaction.
- In the Admin UI tool, navigate to Global Setup / Business.
- Locate the Integration Options / Payments section.
- Check the box labeled Use Shopping Cart.
- Select and configure your CC Processor.
Note: Once enabled, the Shopping Cart consolidates all bookings into one checkout process for the customer.
Which method should I choose?
|
Feature |
Event Level |
Account Level (Shopping Cart) |
|
Payment Timing |
Per appointment |
At the end of the session |
|
Multi-Booking |
Individual transactions |
Combined into one total |
|
Best Use Case |
Single workshops or one-off services |
Multi-day camps, classes, or recurring sessions |
Connecting payment with Authorize.net
To accept payments via Authorize in pickAtime, follow the steps below.
Instructions for Setting Up Authorize:
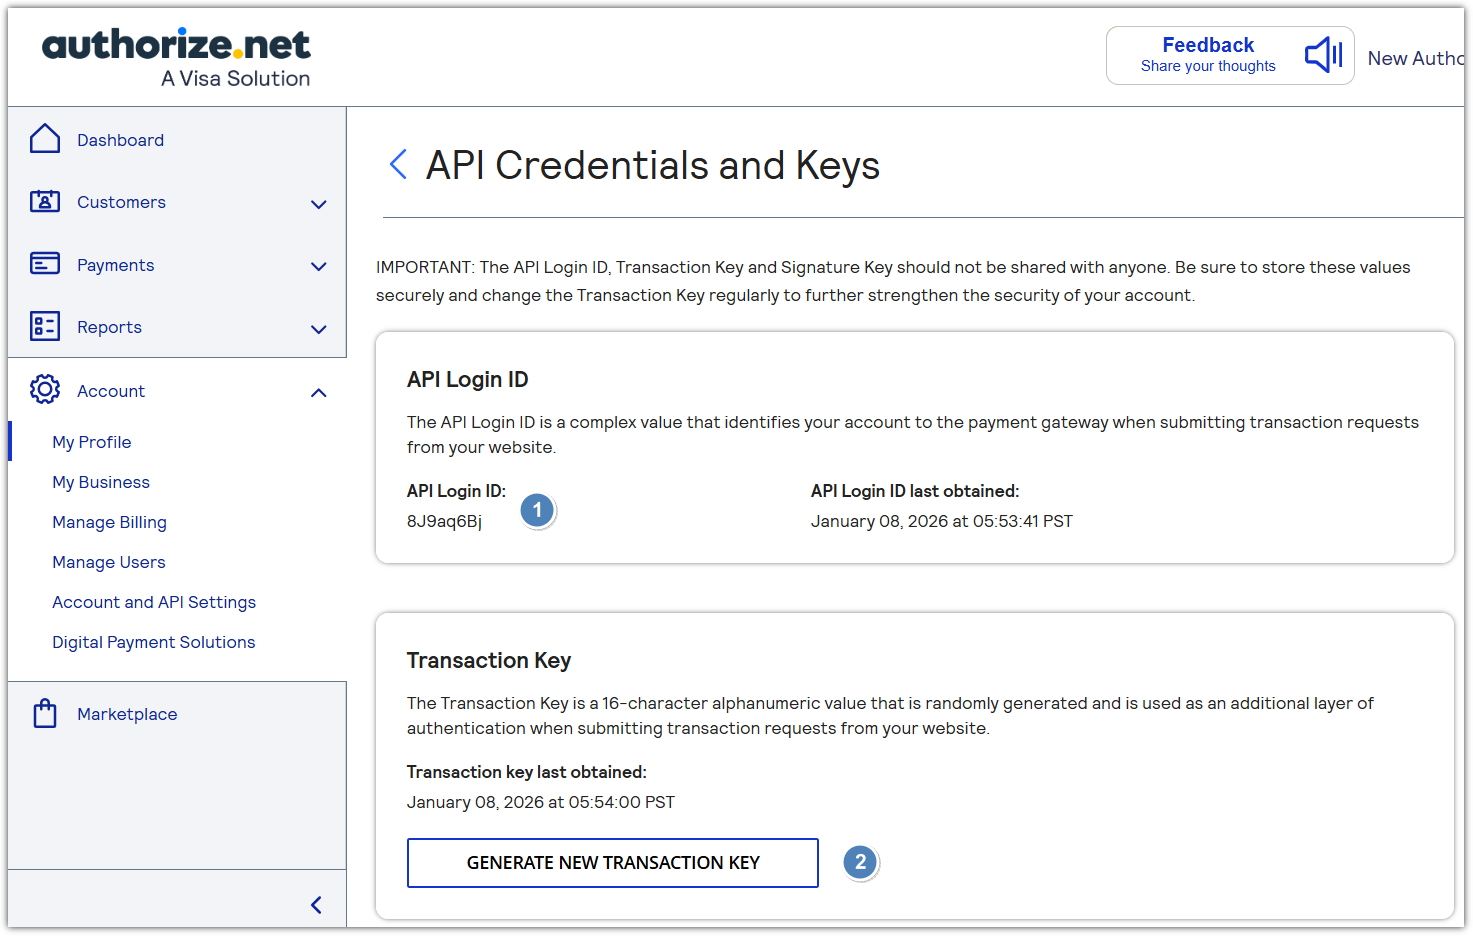
NOTE that if you already have a Transaction Key, you can use it.
- Copy the API Login ID and Transaction Key.
- Configure pickAtime:
- In pickAtime, go to Admin UI / Event Management / Settings / Credit Card Setup.
- From the dropdown menu, select Authorize.net.
- Paste the API Login ID and Transaction Key into the corresponding fields.
- Click the "Check Credentials" button.
- If successful, your Authorize integration is now active.
You are now ready to begin accepting payments via Authorize through your pickAtime scheduling system.
Connecting payment with PayPal
To accept payments via PayPal in pickAtime, follow the steps below.
Note: You must have a PayPal Business or Business-PRO account to proceed.
Instructions for Setting Up PayPal (REST API):
- Log in to PayPal using your Business account.
- Navigate to the PayPal Developer Dashboard.
- Switch to Live Mode (not Sandbox), and open the "Apps & Credentials" tab.
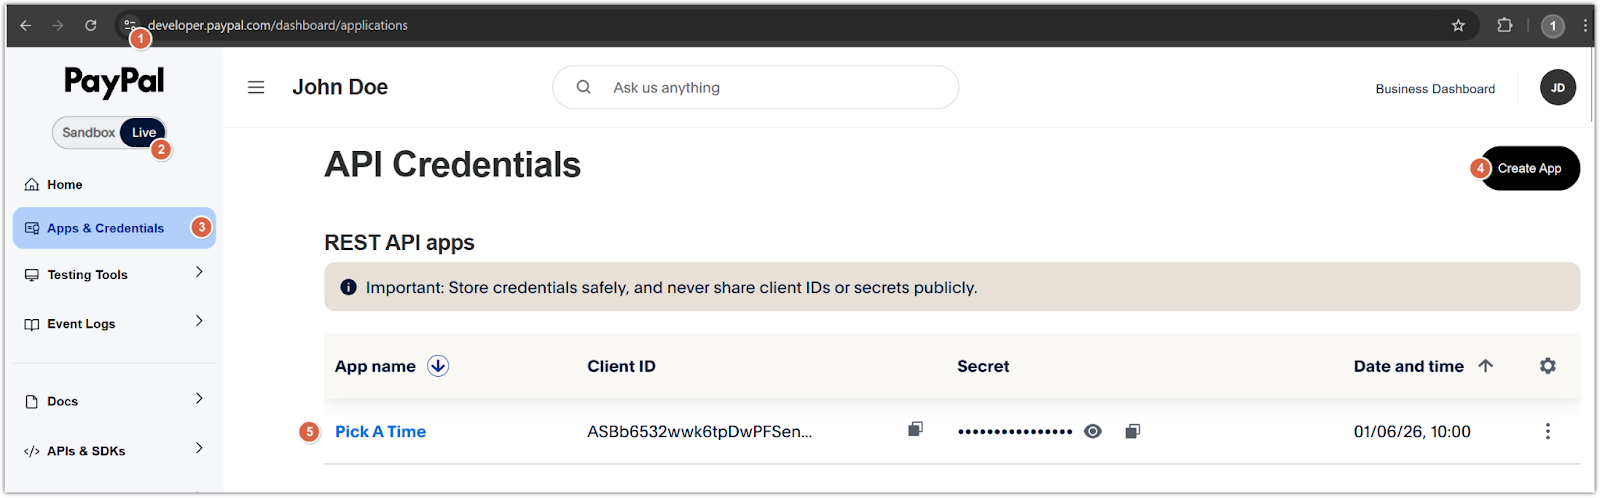
Create a new Merchant application:
-
- Click Create App.
- Give your application a name.
- Once created, you will see a Client ID and Secret.
- Copy both values.
Configure pickAtime:
-
- In pickAtime, go to Admin UI / Settings / Credit Card Setup.
- From the drop-down menu, select PayPal (REST API).
- Paste the Client ID and Secret into the corresponding fields.
- Click the "Check Credentials" button.
- If successful, your PayPal integration is now active.
You are now ready to begin accepting payments via PayPal through your pickAtime scheduling system.
Connecting payment with Stripe
To accept payments via Stripe in pickAtime, follow the steps below.
Note: You must have a Stripe Business account to proceed.
Instructions for Setting Up Stripe:
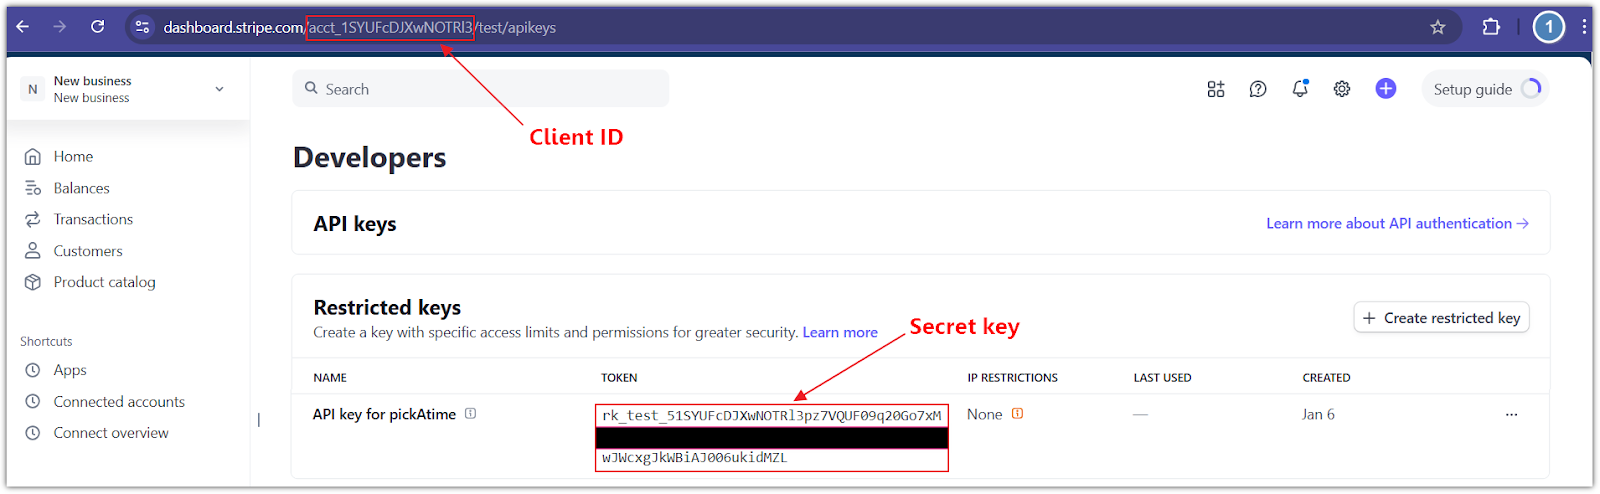
- Log in to Stripe using your Business account.
- In the top-right corner, click Switch live account (not Sandbox).
- In the bottom-left corner, click Developers > API keys.
- In the Restricted Keys section:
-
- Click the Create restricted key button.
- Select the Providing this key to another website option and click Continue.
- Enter the Name of the 3rd-party you're giving your API key to i.e., ‘pickAtime’.
- Provide a link to the 3rd party you're using: ‘https://pickatime.com/’.
- Leave the ‘Customize permissions for this key’ unchecked and click the Create restricted key button.
Configure pickAtime:
-
- In pickAtime, go to Admin UI / Settings / Credit Card Setup.
- From the drop-down menu, select Stripe.
- Paste the Client ID and Secret key into the corresponding fields.
- Click the "Check Credentials" button.
- If successful, your PayPal integration is now active.
You are now ready to begin accepting payments via Stripe through your pickAtime scheduling system.
You can accept payments for appointments at either the Event Level (for single bookings) or the Account Level (for multiple bookings via a Shopping Cart).