# Connecting pickatime with Google Workspace
### **Connecting pickAtime with Google Workspace**
A Google Workspace Service Account provides a simplified user experience by allowing the account to act on behalf of your users in the background, minimizing the need for individual user configuration and setup.
This integration allows central management of features like Calendar Sync, which will help automatically generate Google Meet links for the virtual appointments.
1. Log in to your Org’s Gmail / Google Workspace (G Suite) Console with a Super administrator's credentials at [https://console.cloud.google.com/](https://console.cloud.google.com/). If you haven’t used the Console before, you will first need to agree to the Console’s Terms of Service.
2. Click the Create Project button.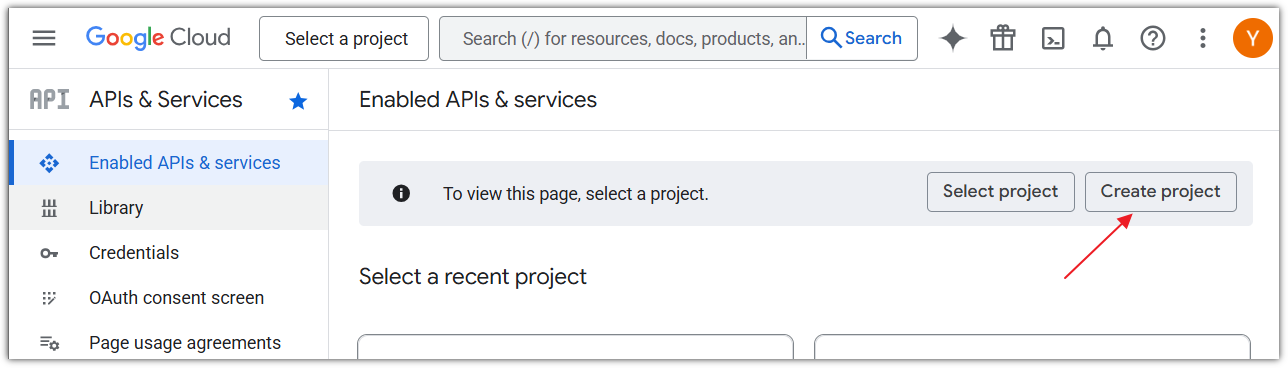
3. Enter a Project name and click Create. In this example, we set the name pickAtime service acc.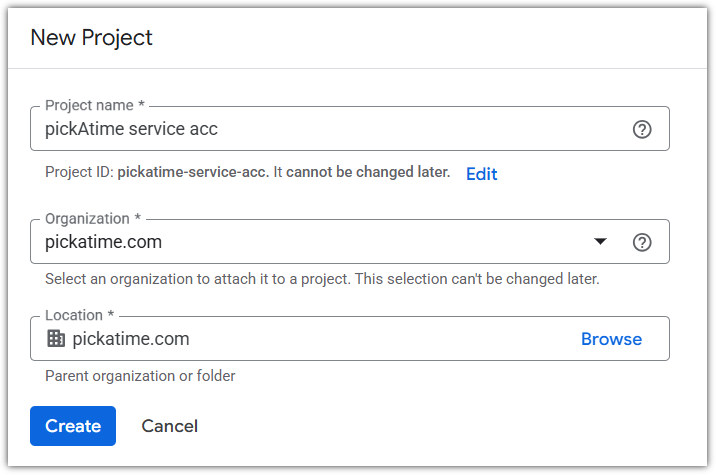
4. In the top left corner of the page, select the Menu button, select APIs & Services in the sidebar. Then select the Enable APIs and Services button.
5. Search for and add the following API keys:
- Admin SDK
- Gmail API
- Google Calendar API
6. Once all API Keys have been added, open the Google Menu and navigate to APIs & Services → Credentials → Create Credentials → Service Account.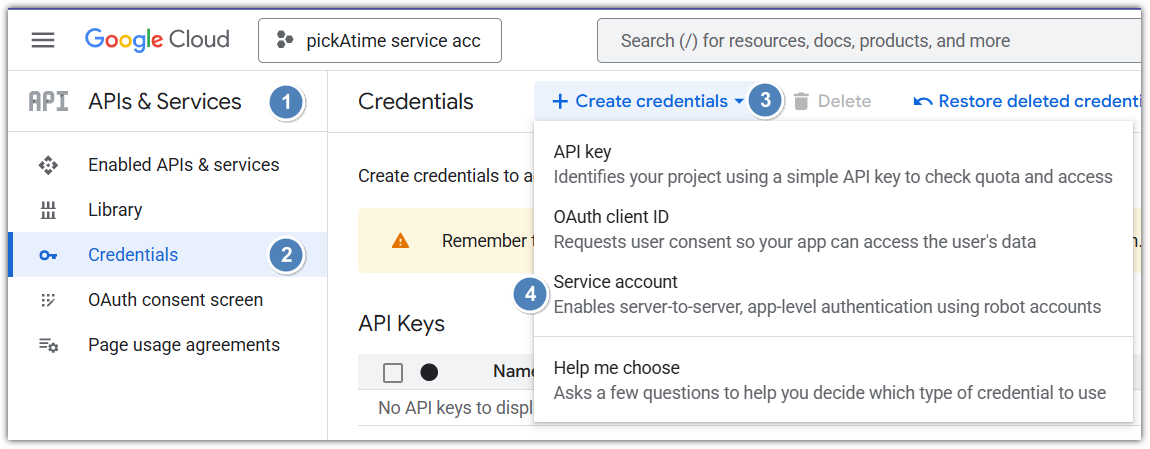
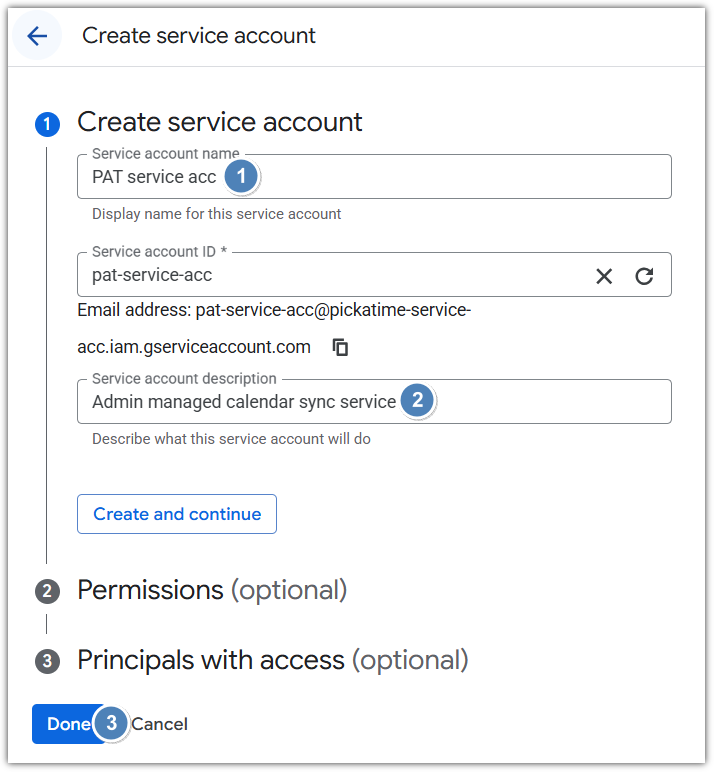
7. On the Create service account wizard:
- Add the Service account name, i.e. ‘PAT service acc’
- Add the Service account descriptions, i.e. ‘Admin managed calendar sync service’
- Steps 2, ‘Permissions,’ and 3, ‘Principals with access,’ are optional and not required.
8. Click Done.
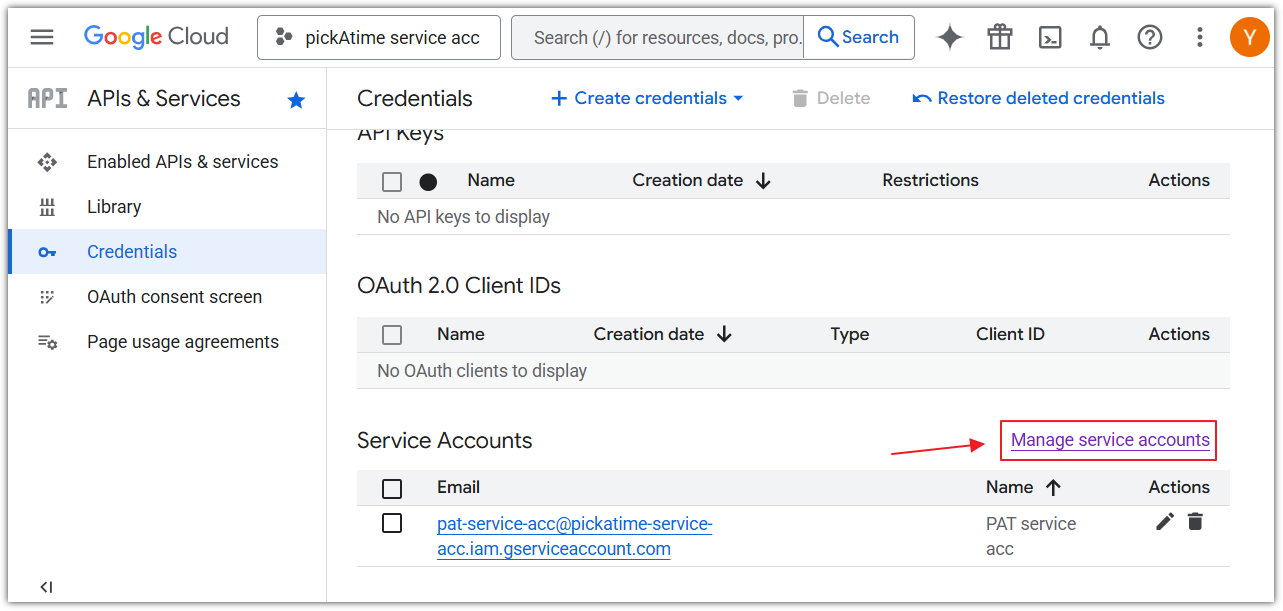
9. Click Manage service accounts
10. For the service account you created, on the far right-hand side in the Actions column, click the 3 dots Menu button > Manage keys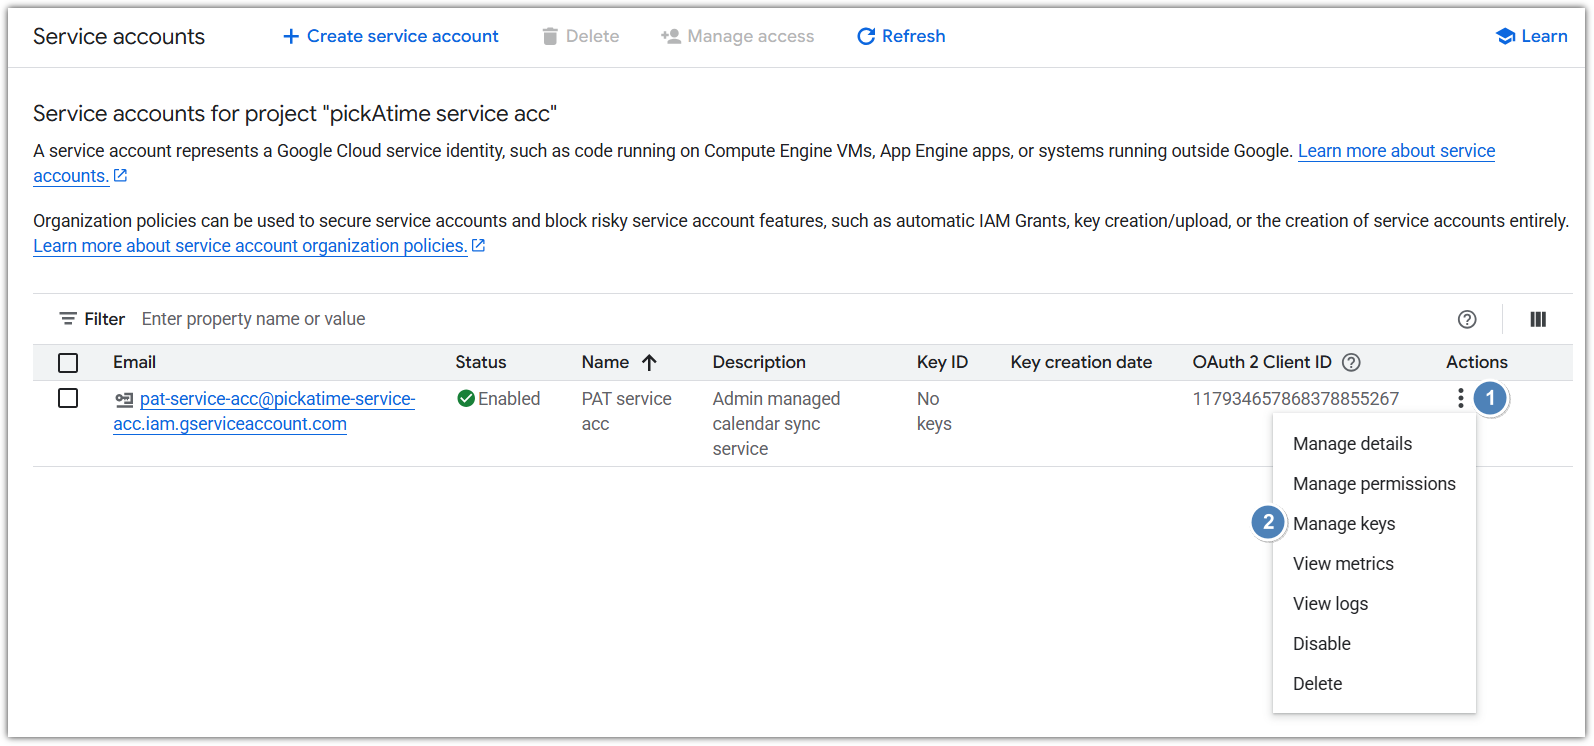
11. On the Keys tab, do the following:
1. Click Add key > Create new key
2. Key type: JSON
3. Click the Create button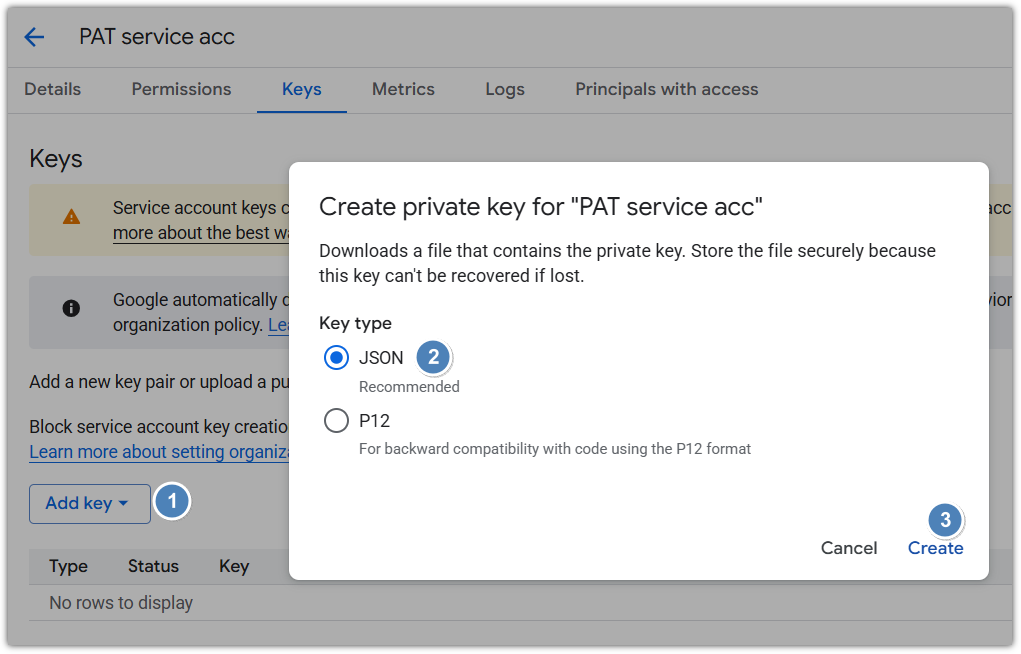
12. On the Details tab, copy the Unique ID value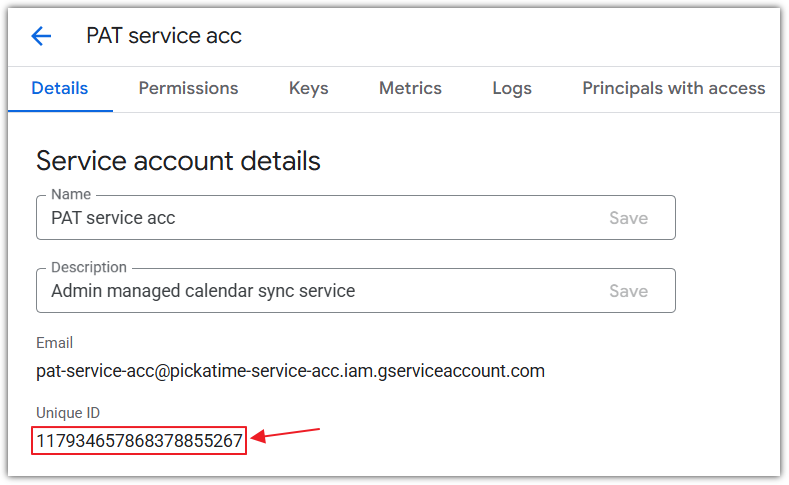
13. Navigate to [admin.google.com](http://admin.google.com/) and do the following:
14. Click Security → Access and Data Control → API Controls.
1. Scroll down to the very end, and click Manage Domain Wide Delegation.
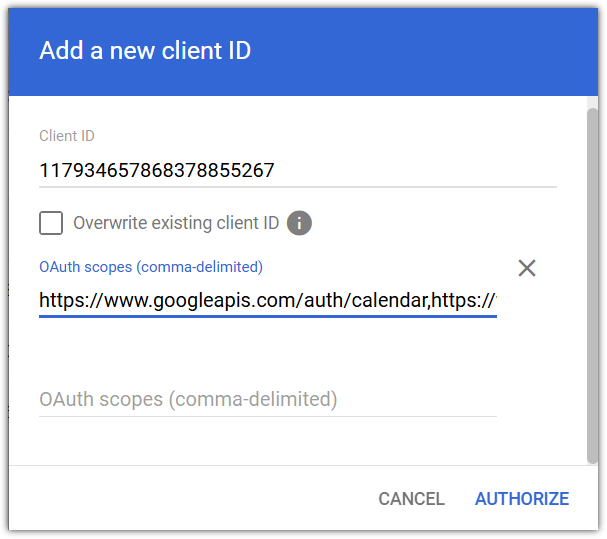
2. Click Add new button.
3. In the Client ID field, paste the Unique ID from the previous step.
4. In the OAuth scopes (comma-delimited) paste the following: [https://www.googleapis.com/auth/calendar,https://www.googleapis.com/auth/userinfo.email,https://www.googleapis.com/auth/admin.directory.user.readonly,https://www.googleapis.com/auth/admin.directory.group.readonly,https://www.googleapis.com/auth/calendar.events](https://www.googleapis.com/auth/calendar)
5. Click Authorize
6. 
15. Connect pickAtime with a Google Workspace:
16. Sign in to pickAtime.
17. In the Admin UI tool, go to the Global Setup/Business page, scroll down to the Integration Options > Google Workspace section.
18. In the Super Admin Email field, add the email address of the Super Admin user in the Google Console.
19. In the Service Account Private key field, upload the JSON file (Which will have been exported from Google when following step #10).
20. Click the " Connect and Map Contacts button, and you will see the Google Workspace Integration Result.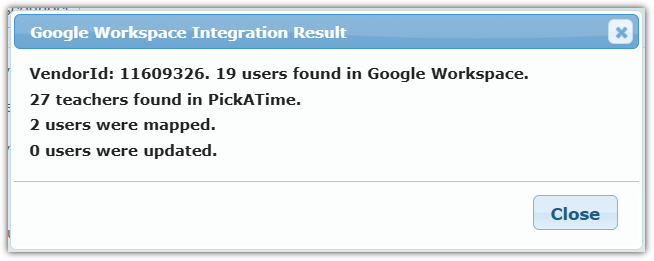
##### **\*\*Please note that the integration will only display “Enabled” when syncing is error-free\*\***