Event Management Guide
- Administrator Access
- Contacts
- Directions for Participants
- How to Book Participant Appointments
- Problem Appointments
- Reports
- Sending Custom Emails
- Viewing Appointments in the Admin UI
Administrator Access
Updating an Existing Contact's Access
- Go to the Contacts tab and search for the contact.
- Select their name.
- Adjust the Admin Level pull-down to set their access.
This allows the contact to log into the Admin UI and view reports, with permissions determined by the level selected (see table below).
Adding a New Administrator
- Click the green Add button.
- Select Admin....
- Fill in the contact's information.
- Set their Admin Level using the pull-down.
The new contact will be prompted to create a password the first time they log in.
Admin Access Levels
| Level | Permissions |
|---|---|
| Appointment Viewer | Can log in and view appointments only — no changes allowed |
| Appointment Maker | Can make appointments from the Admin UI, but cannot change setup or add/remove slots |
| Resource Administrator | Can make/cancel appointments and add/remove slots — limited to the specific resources granted in Resource Access |
| Event Administrator | Full administrative access to one or more specific events — set under Event Access |
| Administrator | Full access to the entire account |
All levels include access to reports.
Granting Specific Access
Some levels require you to specify what the contact can access:
- Appointment Viewer, Appointment Maker, Resource Administrator: Set their accessible resources under Vendor Access / Resource Access.
- Event Administrator: Set their accessible event(s) under Vendor Access / Event Access.
Contacts
The Contacts tab is where your list of administrators and participants is stored. Participant contact records are created automatically the first time they log into the online scheduler.
Note: Participant names don't display automatically — you'll need to search by first or last name to find them.
To get started: From the Admin UI, select Contacts on the top navigation.
Viewing Contact Info
Search for and select a contact to populate their details on the right-hand side. Several tabs are available:
| Tab | What it shows |
|---|---|
| Contact Info | Email, first/last name, admin level, customer access rights, and any custom fields configured under Global Setup / Contacts |
| Appointments (small tab, distinct from the main Appointments tab) | All appointments for this contact |
| Log | Email history and a log of when appointments were booked or canceled |
| Vendor Access | Resource Access and Event Access settings for administrators |
Search options: The Search Control list allows you to search by Last Name, First Name, Email, or any custom ID fields configured under Global Setup / Contacts.
Other actions available from a selected contact:
- Delete — removes the contact
- Reset PW — resets the contact's password to your account's default password (configurable under Global Setup / Contacts)
Setting Up Vendor Access
Important: When adding a new contact with Appointment Viewer, Appointment Maker, or Resource Administrator access, be sure to check the appropriate box under Vendor Access / Resource Access — otherwise they won't have access to any resources.
Master Access: The "Allow access to all events and all resources" option under Master Access is only available for Appointment Viewer and Appointment Maker levels. It is not available for Resource Administrator or Event Administrator levels, which require resources/events to be granted individually.
Adding a New Contact
- Click Add.
- Fill in the fields marked
<not entered>on the form.
Note: You can't create a new contact using an email address that's already associated with another contact on your account.
Directions for Participants
Follow the directions provided by your company to get to the Online Scheduler, then follow the steps below.
Step 1: Sign In
- Enter your email and click Next.
- Returning users: If your email is recognized, enter your password.
- New users: If your email isn't registered, follow the prompts to Sign Up.
Step 2: Select a Resource
Choose the resource(s) you'd like to book with, then click Filter Slots.
Step 3: Book an Appointment
The scheduling grid displays available times as squares with a plus sign (+).
- Click your preferred time square.
- Click Create Appointment.
- A confirmation message will briefly appear at the top of the screen.
Managing Your Schedule
View or Print Your Schedule
Click Printable Schedule in the left-hand sidebar to see your full itinerary.
Changes & Cancellations
On a computer:
- Click My Appointments in the left-hand sidebar.
- Locate the appointment you'd like to change.
- Hover over the appointment to reveal Details, Edit, and Cancel options.
On a mobile phone:
How to Book Participant Appointments
Step 1: Locate the Time Slot
- Select the Appointments tab at the top of the screen.
- Use the calendar on the left to navigate to the desired date.
- Click the green plus sign (+) in the time slot you'd like to book.
Step 2: Select the Participant
The Select Person dialog will open. You have two options:
Option A: Search for an existing contact
- Type the participant's name (or the first few letters) in the search field on the left.
- Select the correct name once it appears.
- Verify the contact information shown on the right.
- Click OK to finalize the appointment.
Option B: Create a new contact If the participant isn't found:
- Enter their First Name, Last Name, and Email Address in the fields on the left.
- Click the green Add button.
- Click OK to create the contact, then OK again to book the appointment.
Pro Tips for Scheduling
- Partial searches work: You don't need the full name — typing just the last name (or part of it) often finds participants faster.
- Verify before confirming: Always double-check the email address on the right before clicking OK, to make sure confirmation emails go to the right person.
Problem Appointments
The Appointments List page shows a master list of all appointments, including any that need attention.
Red Appointments — Rule Violations
What they are: Previously booked appointments that violate a rule configured under Settings → UI Setup.
How they're created:
- An admin manually books an appointment that breaks a configured rule (e.g., booking limits, one-appointment-per-teacher rules).
To resolve:
- Click the red appointment to see the reason for the conflict, shown below the calendar.
- Open the Appointments drop-down and select Confirm Appointment to force the booking and clear the flag.
⚠️ Important: Red appointments are invisible to participants — they do not appear as booked on the participant's schedule, and reminder emails will not be sent until the appointment is confirmed. Always check the Appointments List for unresolved red appointments.
Orange Appointments — In Progress
What they are: Appointments currently being booked by a parent, mid-process.
Behavior:
- Cannot be manually deleted or selected for email notifications.
- Automatically managed by the system — if the participant is inactive for too long without completing the booking, the appointment is automatically canceled.
- The orange status disappears once the participant clicks Create Appointment to finish booking.
This status is useful for admins booking appointments manually: it prevents you from accidentally selecting a time slot a parent is currently in the process of booking.
Deleted Slots with Existing Appointments
When you delete a slot that has appointments booked on it, those appointments are not deleted — they're flagged instead, and will appear in the Appointments List for review.
Reports
When you log into pickAtime, you'll land on the Event Reports page by default. Reports fall into two categories: Event-Specific and Account-Specific.
Event-Specific Reports
Select your event from the Event pull-down. If your event's dates have already passed, enter a From/To date range to pull historical data — otherwise, this is optional.
Managing Reports
Every report supports the following options:
| Action | Description |
|---|---|
| Format | Print, export to XML, or export to tab-delimited (Excel-compatible) |
| Email Report | Send the report to yourself or others |
| Save Report Settings | Saves customizations (e.g., added fields) so they persist next time you run the report |
| Schedule Report Delivery | Set a date range, time of day, and frequency for automated email delivery |
Account-Specific Reports
Select Account Reports mode to view data across your entire vendor account (all events).
| Report | What it shows |
|---|---|
| Settings | Your account's auto-generated scheduler URL |
| Account – Invoices and Payments | Account balance, invoice history, and payment history. Click an invoice # to view it and pay by credit card. |
| Problem Appointments | Appointments placed "on hold" — e.g., when a slot with an existing appointment is deleted, the appointment isn't deleted but flagged here for review |
| Appointments from All Events | All appointments across every event on your account |
| Appointments for All Roster Events | All appointments across every Roster event |
| Contacts Without Appointments | Contacts who've logged in but never booked an appointment |
| List of Admins | Admin emails and access levels. For teachers (auto-assigned Appointment Viewer access), this also shows which resources they can access. Click Additional Fields → Last Logged In to see last login dates. |
| % Full | Percentage of booked vs. available slots, across multiple events |
| Cancelled Appointments | All cancelled appointments, with cancellation date/time and who cancelled |
| Appointment Counts for All Events | Total appointment counts across every event |
| Resource Mapping | Shows all resources and their associated contacts. |
| Scheduled Report Delivery | Overview of your automated report deliveries — recipients, frequency, last sent date. Delete entries here to cancel a scheduled delivery. |
| Appointments Summary by Contacts | Summarizes appointments by each contact |
Sending Custom Emails
The Appointments List page — not the main Appointments page — lets you search for and manage appointments by:
- A single date
- A date range
- An event
This returns a list of parents with appointments matching your search, along with options to email, delete, confirm, or recreate slots and appointments.
Sending Emails from the Appointments List
- Click Send Email at the top of the page.
- Choose Send to All or Send to Selected.
- In the dialog that appears, choose an email type:
- Reminder email
- Custom email
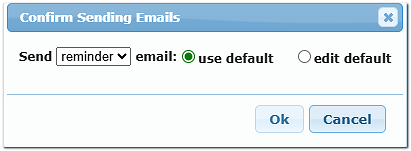
You can send using the existing template as-is, or customize it for this send.
Email templates are managed under Settings/ Notification Setup.
Viewing Appointments in the Admin UI
You can adjust several display settings to make the Appointments page easier to read.
Adjust row height (make time slots taller): On the Appointments tab, hover over one of the horizontal lines just above a time marker, then click and drag vertically.
Adjust column width: Hover over the space between two resource columns, then click and drag.
Adjust time markers and gridlines: Go to Settings / Vendor UI Setup and modify "Time Mark Display on the Appointments Page."
Adjust the visible time range (scroll bar limits): On the same Vendor UI Setup page, under "Hours Visible on the Appointments Page," set the minimum and maximum hours shown.
This range applies account-wide per event — it is not day-specific. If one day has slots from 8–5 and another has slots from 9–6, set the range to 8–6 so the scroll bar covers all possible slot times across every day.