ClassLink
ClassLink Integration
The pickAtime and ClassLink integration consists of two essential components: Direct Data Import and Single Sign-On (SSO). Follow the steps below to connect your accounts.
Step 1: Add the pickAtime Application
-
Log in to your ClassLink Management Console (CMC).
-
Navigate to Applications.
-
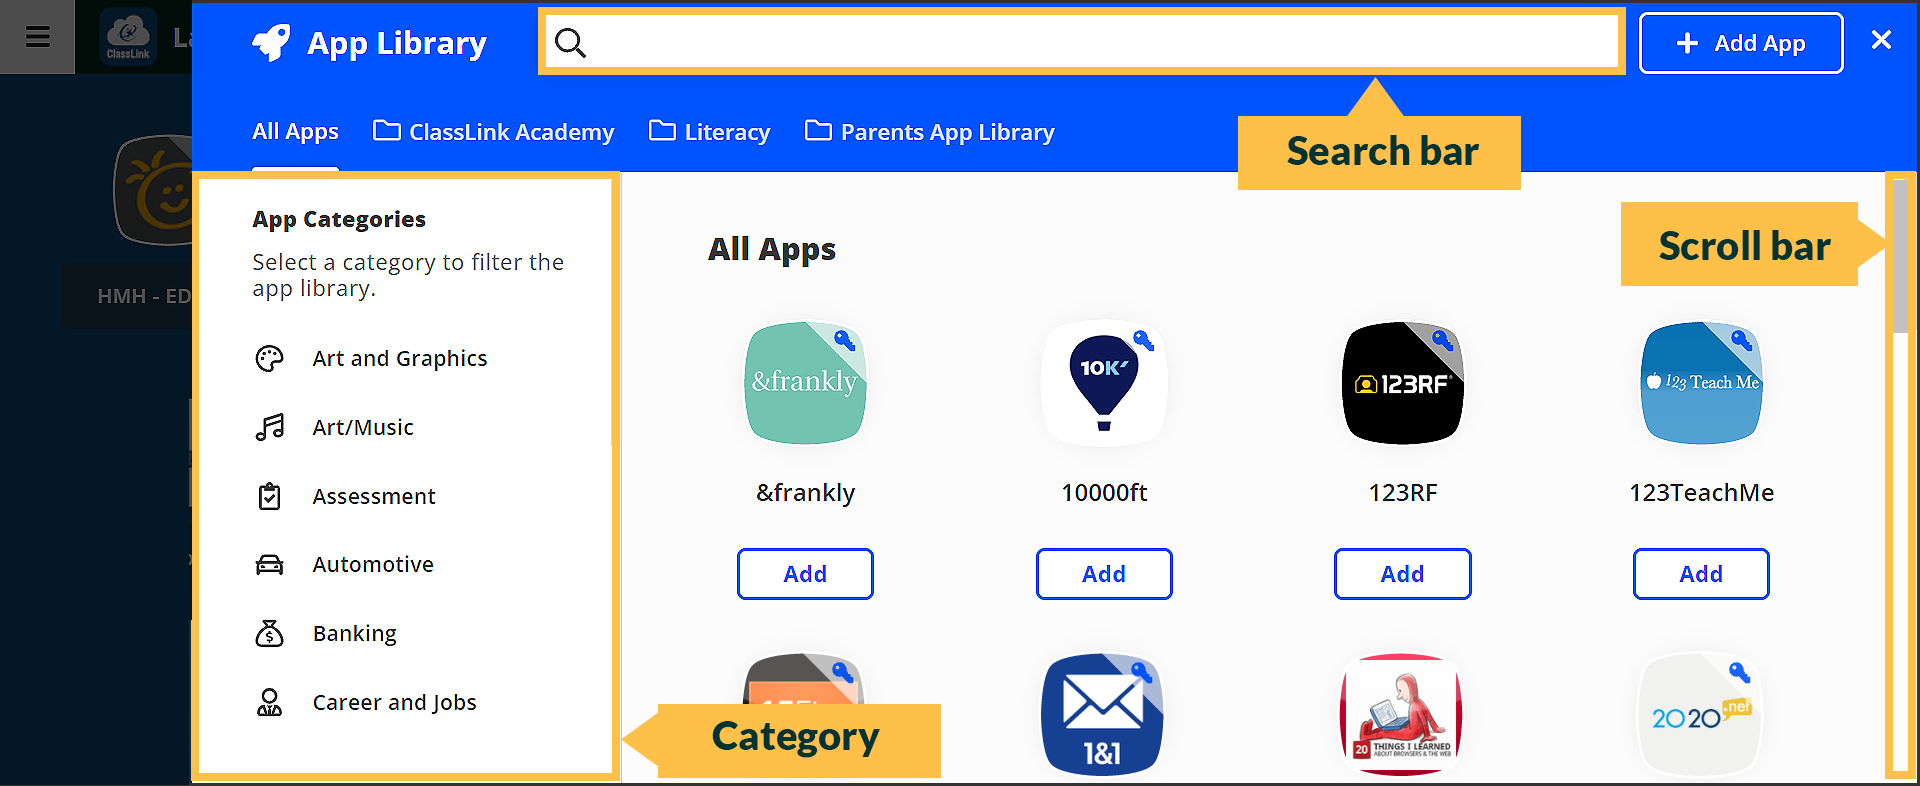
Select Add & Assign App, then App Library.
-
Search for pickAtime in the App Library.
-
Add the application to your LaunchPad environment by clicking the Add button for the app.
If you do not see the pickAtime application, contact pickAtime Support for assistance.
Step 2. Enable Direct Data Import
Use this to automatically import teachers, students, class rosters, parents, and parent-student relationship data for your parent-teacher conferences.
- Once you have added the pickAtime app, you will set up your data sharing permissions. For a step-by-step guide, visit the Add Applications and Determine Data Sharing Permissions page within the ClassLink Help Center.
- Once the app is added and sharing permissions are set, pickAtime will receive an automated notification. Our team will configure the import on our end.
- Confirmation: You will receive an email from us once the data import is active and ready for use.
- Before your initial import, navigate to the Rosters > Demographics section in ClassLink. Ensure that the security value (student DOB) permission is activated for the pickAtime app. This is required to allow parents to link to their students. Please review the following page to learn more about enabling this permission for the pickAtime app.
- Once permissions are updated, run the data import.
Recommendation: Clear old data before the new import.
Step 3. Configure Single Sign-On (SSO)
This allows your users to log in to pickAtime securely using their ClassLink credentials.
- Log In: Sign in to the pickAtime Admin UI.
- Navigate: Go to Global Setup / Business.
- Locate SSO Settings: Scroll down to Integration Options and find the Single Sign On section.
- Select Provider: Choose ClassLink SAML from the SSO Provider drop-down menu.
- Enter Credentials: Paste your IdP Metadata URL into the respective field.
Note: If you need help finding these URLs, refer to the SAML Console page within the ClassLink Help Center for a step-by-step guide on locating your IdP credentials.
Step 4: Assign the Application
Assign the pickAtime application to the users or security groups who should have access, such as:
-
Administrators
-
Teachers
-
Staff
-
Parents
-
Students (if applicable)
Only assigned users will see the pickAtime application in their LaunchPad. Click here for details.
Step 5: Test the Connection
Before making the application available to all users:
-
Sign in to ClassLink using a test account.
-
Launch the pickAtime application from LaunchPad.
-
Verify that the user is automatically signed in to pickAtime without being prompted for a separate username or password.
-
Confirm that the correct pickAtime account is open and that the user's permissions are correct.
Step 6: Publish the Application
After successful testing, make the application available to your desired user groups.
Users can now launch pickAtime directly from their ClassLink LaunchPad using their existing ClassLink credentials, eliminating the need to remember a separate pickAtime username and password.
NOTE: Preventing Duplicate Contacts for Existing pickAtime Accounts
If your school has used pickAtime without integration, imported data files manually, and now wants to enable a ClassLink integration, duplicate contact records may occur due to differing contact IDs (teacherID, studentID, parentID).
Steps to remove old data:
- Create a new event using a past event as a template to preserve settings, notifications, and appointment fields.
- (Optional) Export reports from past events on the Reports page.
- Delete all past events except the new one.
- Go to Global Setup / Contacts / Advanced Options, then click Delete All Contacts. In the pop-up, select Level to delete: Admin Level - Event Administrator (this removes contacts with lower access level and contacts with customer access level - parents and students).
- Run the new integration import.
This ensures clean data syncing without duplicates. Contact support@pickatime.com if needed.
Parent Access
If using SSO
Parents using SSO will access via the App Shell on LaunchPad, using the instructions included here.
If not using SSO
Parents not using SSO will access from pickAtime using the URL provided by the school, using the instructions included here.
FAQ: We recently switched to ClassLink. Parents can sign in, but when they try to link their child, they receive the error: "We are unable to find your student records with the values you have supplied." And when we view the contact record for that student, the security value field is blank. How do we fix this?
A: This error occurs because student Security Values (Dates of Birth) were not included in the initial data import. When a parent enters a birth date to verify their student, the system finds an empty field in pickAtime and denies the match.
The security values (student DOB) are located in the Rosters > Demographics section in ClassLink. Most likely, this step may have been skipped when the pickAtime app was initially added. Please review the following page to ensure you have enabled this permission for the pickAtime app.
Once permissions are updated, run the data import again. This will populate the missing birth dates in pickAtime and allow parents to successfully link their students.
Parent Instructions for Classlink SSO
Step 1: Sign In
Parents access the pickAtime Online Scheduler directly from LaunchPad, via the pickAtime App Shell.
Step 2: Select Your Student(s)
Your student will already be attached to your account.
- Click the student(s) whose schedule you'd like to view.
If a student is attached but shows no classes within the event, please contact the event administrator.
Step 3: Select Teachers
By default, all of your child's teachers are selected.
- To exclude a teacher: Uncheck the box next to their name.
- When ready: Click Filter Slots.
Step 4: Book Appointments
The scheduling grid displays available times as squares with a plus sign (+).
- Click your preferred time square.
- Click Create Appointment.
- A confirmation message will briefly appear at the top of the screen.
- Repeat for each teacher you'd like to visit.
Managing Your Schedule
View or Print Your Schedule
Click Printable Schedule in the left-hand sidebar to see your full itinerary.
Changes & Cancellations
On a computer:
- Click My Appointments in the left-hand sidebar.
- Locate the appointment you'd like to change.
- Hover over the appointment to reveal Details, Edit, and Cancel options.
On a mobile phone: