# Setting up a Consent Form
#### **Adding Consent Forms in pickAtime**
If you need participants or parents to acknowledge and agree to specific terms (e.g., loan agreements, waivers, policies), pickAtime provides flexible options using the Appointment Fields page.
---
#### **Recommended Method: Using a Text Display (Header or Subheader)**
1. ##### **Create a New Appointment Field:**
- Navigate to **Settings / Appointment Fields**.
- Add a new field that contains the full text of your consent form.
- Set the Type to Header or Subheader to display the text without requiring a response.
2. ##### **Customize the Button Text:**
- Go to **Settings / CUI Messages**.
- Modify the "Make appointment / Create" button text to something like "Accept and Make Appt."
**Example**:
- “By clicking 'Accept and Make Appointment' I am agreeing to all district policies for the loan of this Chromebook.”
- Follow this with a list of your policies or terms.
This method is great for providing clear consent language without requiring user interaction beyond the appointment confirmation.
---
#### **Alternative Method: Using a Checkbox Confirmation**
1. Create a New Appointment Field:
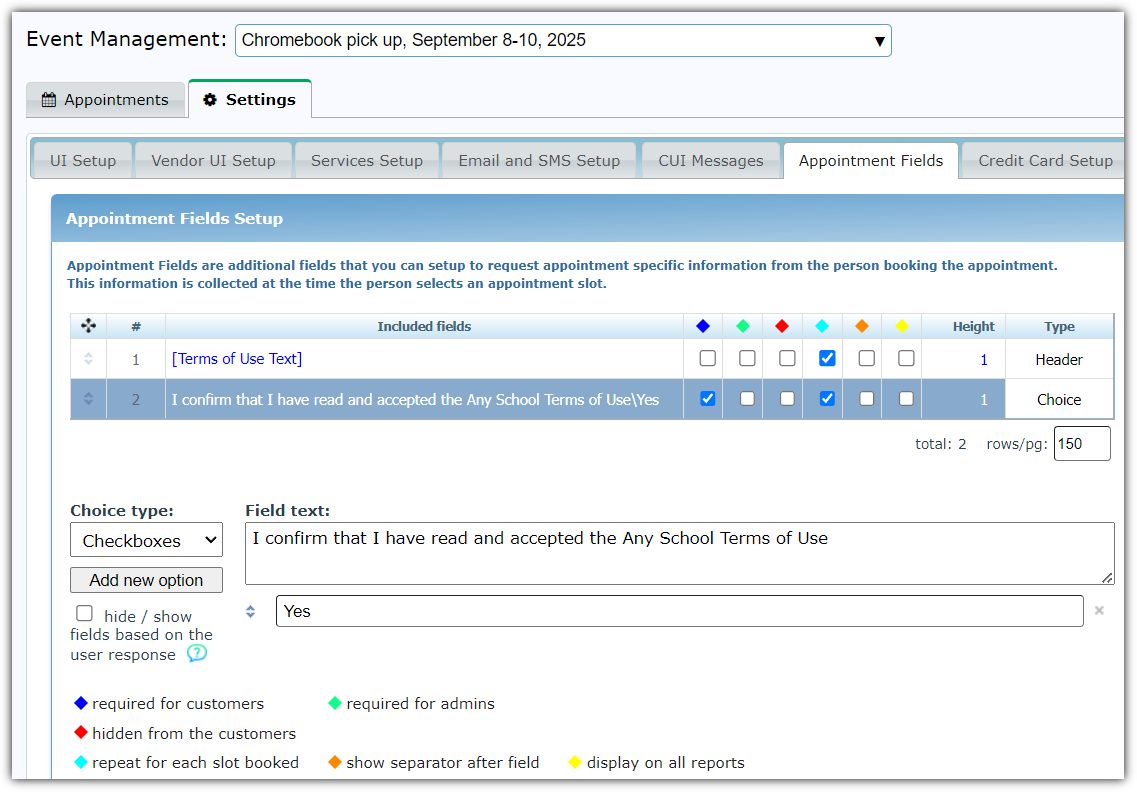
- Go to **Settings / Appointment** Fields.
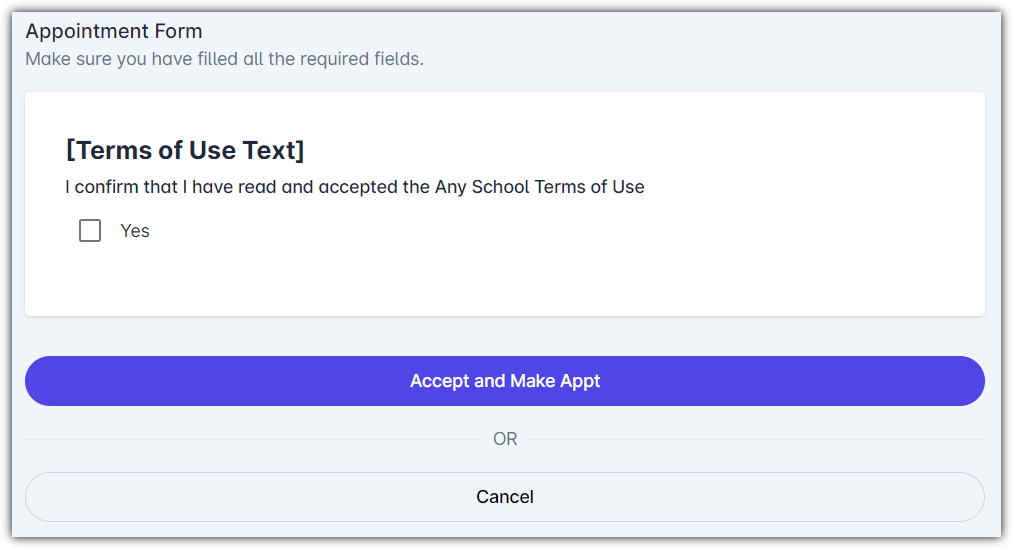
- Add a new field with your consent language, e.g., "I confirm that I have read and accepted the Any School Terms of Use."
3. Set the Field Type to Choice / Checkboxes:
- Under Type, select Choice.
- In the option type, choose Checkboxes.
- Add one option labeled Yes.
Example View for Participants:
- Checkbox: "I confirm that I have read and accepted the Any School Terms of Use."
---
These features allow schools and organizations to collect informed consent from participants or guardians while customizing the scheduling flow for clarity and compliance.
##### **Admin UI Display**
##### **CUI Display**