Setting up a Consent Form
Adding Consent Forms in pickAtime
If you need participants or parents to acknowledge and agree to specific terms (e.g., loan agreements, waivers, policies), pickAtime provides flexible options using the Appointment Fields page.
Recommended Method: Using a Text Display (Header or Subheader)
-
Create a New Appointment Field:
- Navigate to Settings / Appointment Fields.
- Add a new field that contains the full text of your consent form.
- Set the Type to Header or Subheader to display the text without requiring a response.
-
Customize the Button Text:
- Go to Settings / CUI Messages.
- Modify the "Make appointment / Create" button text to something like "Accept and Make Appt."
Example:
- “By clicking 'Accept and Make Appointment' I am agreeing to all district policies for the loan of this Chromebook.”
- Follow this with a list of your policies or terms.
This method is great for providing clear consent language without requiring user interaction beyond the appointment confirmation.
Alternative Method: Using a Checkbox Confirmation
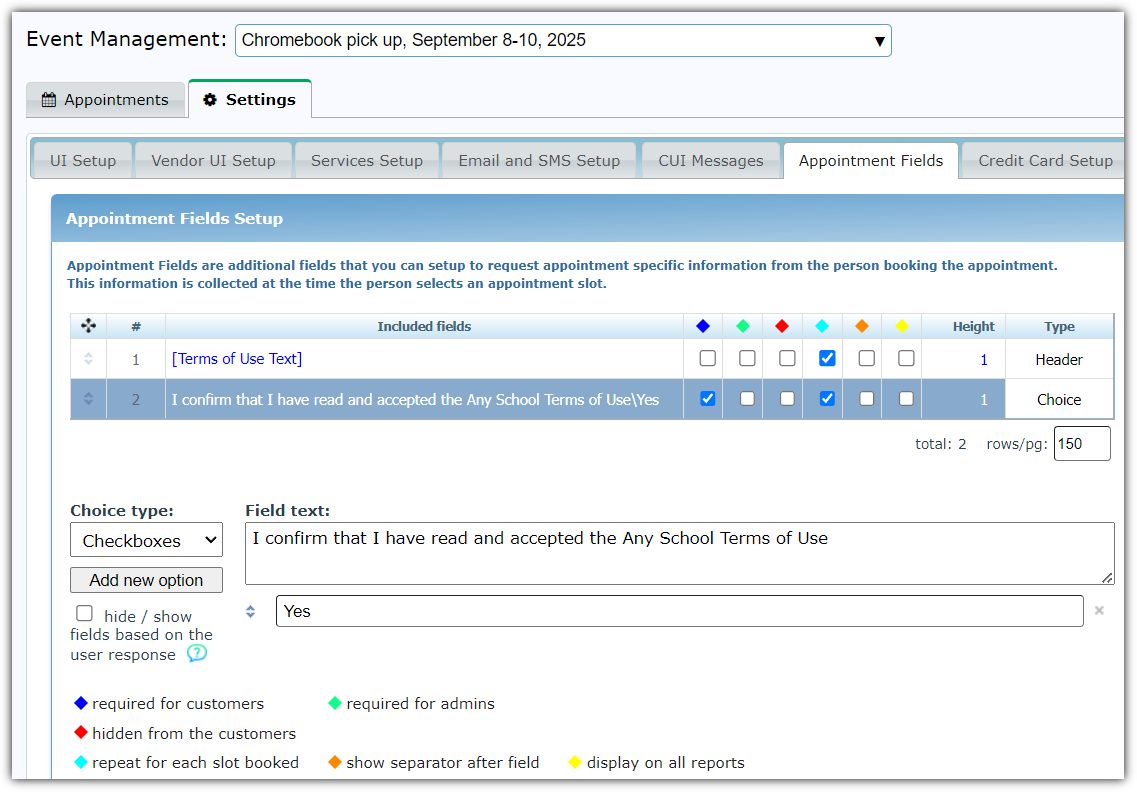
- Create a New Appointment Field:
- Go to Settings / Appointment Fields.
- Add a new field with your consent language, e.g., "I confirm that I have read and accepted the Any School Terms of Use."
- Set the Field Type to Choice / Checkboxes:
- Under Type, select Choice.
- In the option type, choose Checkboxes.
- Add one option labeled Yes.
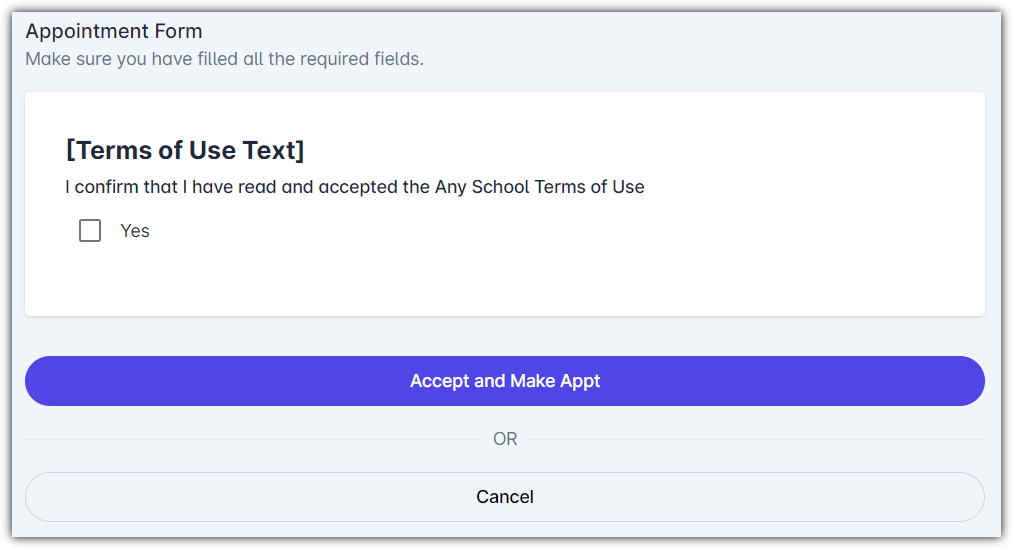
Example View for Participants:
- Checkbox: "I confirm that I have read and accepted the Any School Terms of Use."
These features allow schools and organizations to collect informed consent from participants or guardians while customizing the scheduling flow for clarity and compliance.
Admin UI Display
CUI Display