# Calendar Invite Options
PickAtime allows your participants and admins to add their appointments to their calendars. Follow the instructions below
### **Participants side**
The option to have your participants add their appointments to their calendars is automatically offered on the Appointment Details page.
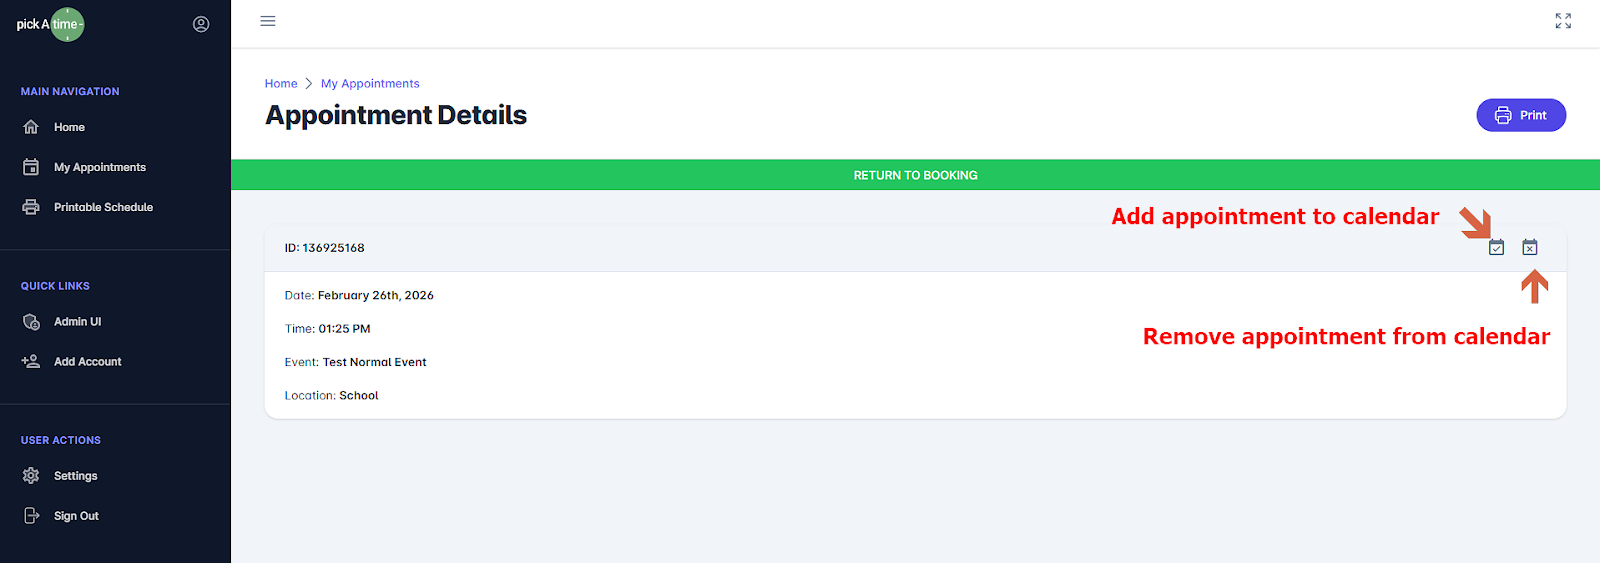
The appointment confirmation email that the participant will receive will also include the calendar option. For Gmail users, the appointment will automatically be added to their calendar. For Outlook users, they will be able to add the appointment to their calendar via the ICS file.
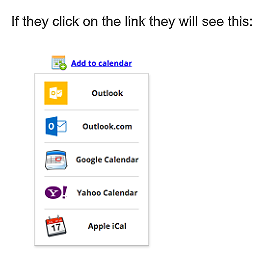
To make changes to the Calendar Notification, go to the notification content:
- **Events Management, Settings, Notification Setup,** and **Calendar Event Notification**.
#### **Calendar Event Notification Section**
At the top of the Calendar Event Notification section is the following:
Your Title\* line, which allows for customization.
The Description of the notification.
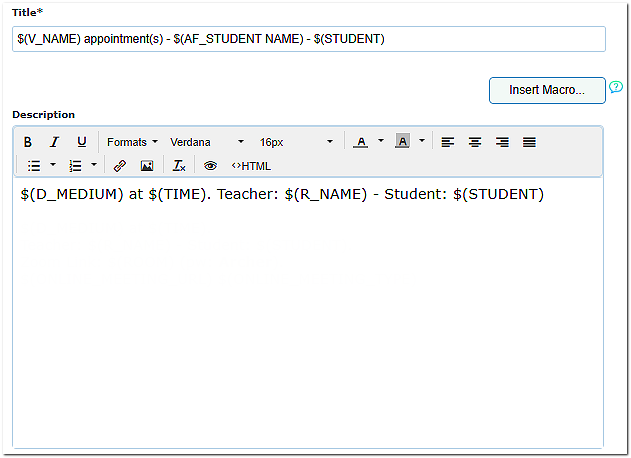
Insert Macro allows you to insert the correct macro for customization. [Click here to learn more about Macros](https://help.pickatime.com/books/additional-event-features/page/macros).
Your Location\* section can be customized with the text, links, and graphics required.
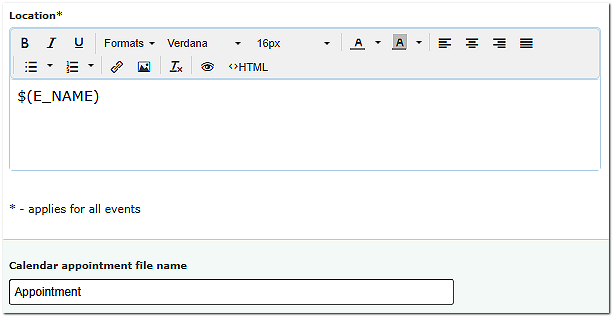
Your Calendar appointment file name can be customized to what would work best for your participants.
---
### **For your Admins**
To allow admins to add appointments booked with them to a calendar, there are two different options:
##### **1) The Resource Notification Email **
You can receive an appointment notification email that you can add to your calendar each time a participant books an appointment. The Resource notification email that the admin will receive will include the calendar option.
You would do the following:
- To turn on the option, go to the Settings/Notification Setup page. Check the box labeled "for resources assigned to a contact, send appointment notification via email."
- Assign a contact person to your resource (the resource holds the slots). Go to the Appointments page. Click on the Resource column. Click on Resources and then Assign Contact. Locate the contact person in the contacts as the contact to receive the email. Click on the name and press select. The contact person is now assigned to the resource, and you'll notice that the Resource Name in the Appointments page has been changed to the contact name. To change this to something else (e.g., a generic name), click in the label area and change the name.
The option to check the For resources assigned to a contact, send appointment notification via email option. This option must be checked for emails to go out.
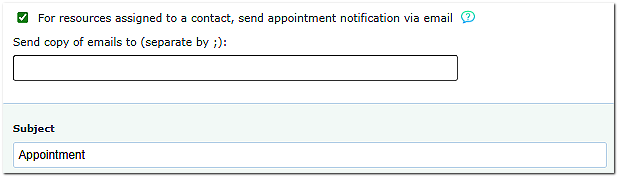
Insert Macro allows you to insert the correct macro for customization. Each email template is already preset with the general macro required for most events. [Click here to learn more about Macros](https://help.pickatime.com/books/additional-event-features/page/macros).
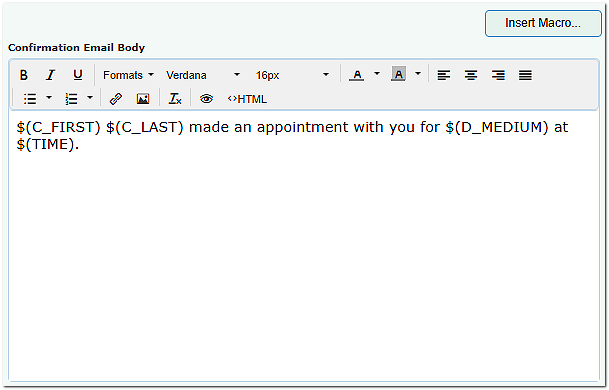
Your Confirmation Email Body and Cancellation Email Body sections can be customized with the text, links, and graphics needed.
#### **2) Subscribe to iCal Feed**
Subscribe to the calendar of appointments. On the Reports / Event Reports page, we have 'Subscribe to iCal Feed' option.
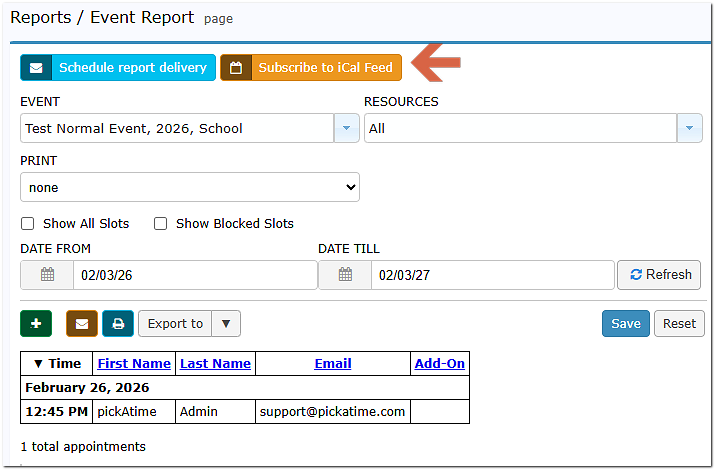
If you check this box, you will see 'Link to subscribe' and 'Download ICS file' options.
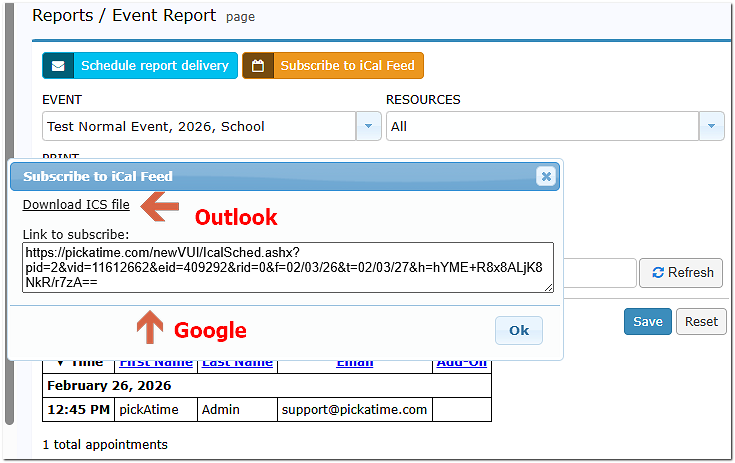
If you use the 'Link to subscribe', your calendar will be automatically updated when new appointments are booked or canceled. If you are using the 'Download ICS file', new appointments will not automatically show up in your calendar application. Also, note that when deleting the iCal Feed, it may take up to 24 hours for the appointments to disappear.
##### **If you are using Google Calendar:**
Click on the Other Calendars function button, then select:
- 'Add by URL' option - if you want to use 'Link to Subscribe'.
- 'Import calendar' option - if you want to 'Download ICS file' and import it.